No-one relishes the prospect of a broken chain when out riding on a road bike but there are a couple of fairly easy fixes to get you back home.
The easiest way to learn how to go about repairing your chain or feeling comfortable doing it, is to have someone show you then actually practice with a chain and a chain tool. You’ll then have no trouble at all making a temporary repair to a road bike chain once you’ve seen it done and practiced it yourself a few times.
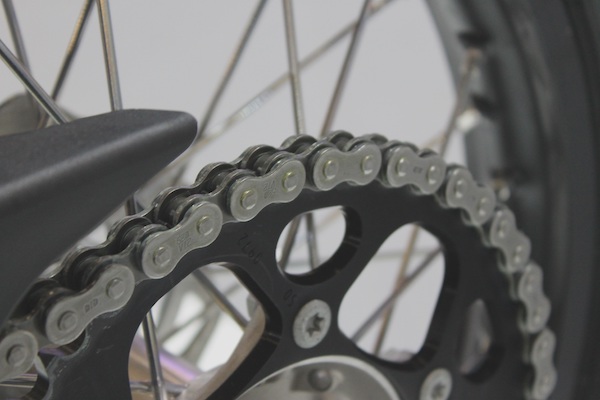
For info, your bike chain has three basic components: the metal side plates, the rollers between the side plates and the rivets (or pins) which thread through the rollers and help to hold the plates together. These rivets allow the rollers to freely turn as the chain moves around the cogs on the rear wheel cassette or crankset chainring.
So, the worst’s happened and your chain’s suddenly snapped. Tip: you should always carry with you a chain tool and ideally a master link.
Using a Master Link to Fix a Chain
You’ll no doubt be able to see damaged outer plates at the broken link. Use the chain tool to press out both rivets to remove the damaged plates.
Then reconnect the chain using the master link. Pay attention to any directional arrows on the master link and ensure they follow the direction of chain travel. To engage the master link so your road bike’s ready to ride again, make sure it’s on the upper row of the chain, apply the rear brake and apply force to the pedals.
The good thing about this master link fix is that the length remains the same so you’ll have all the gears for the ride back.
Reusing a Rivet to Repair a Chain
It is possible to repair your chain even if you don’t have a master link to hand. You can use the damaged rivet as a last resort. Basically what you’ll be doing is removing the broken link and reattaching the two ends of the broken chain so you’ll be riding on a shorter chain until you can get it replaced.
Using the chain tool, break the chain at the damaged link and push out a second rivet just enough to to remove the damaged segment of the chain. You’re then going to reconnect the chain using the rivet you pushed out. Using the chain tool, push the rivet back in until it matches the depth of the neighbouring rivets.
Remember, this is a temporary fix and the the rivet strength has been significantly compromised plus the chain is now shorter so you should avoid shifting up to the largest cogs and chainrings.
Don’t forget to swap this chain for a new one on your road bike when you get home!